Monday, August 20, 2012

Mani Monday: Sally stitches

I've been seeing all these quilt manicures and the first thing I though of was Sally stictches' dress. I gave it a go and here's the results. I'm pretty content with them. :)

Sunday, August 19, 2012

Up for review: Carmex healing lotion

This stuff is the greatest lotion I've ever used. I'm not a lotion person. Especially if it makes your skin feel greasy. But this lotion is perfect. It just has a light scent so it's not overwhelming and it makes your skin super soft.
It's about $6 per tube but so worth it. You can find it at most drug stores and of course super stores.

Monday, August 13, 2012

Under review: influenster voxbox 2

I got my second voxbox a month or so ago and can't wait to tell you about all the goodies that came in it.
They provided me with the new shampoo called Clear, two Sally products (you know I love Sally), a Quaker soft baked bar, always radiant products, and Hawaiian tropic silk hydration sunscreen! I'll tell you more about each product later this week.

Opi nail apps: under review

I'm going to start out by saying I was completely ecstatic about trying these polish strips. I love the Sally and kiss ones and assumed OPI wouldnt let me down with theirs. I was definitely wrong. Unlike Sally, you have to rub these strips to warm them up. They're really thick and plasticy so they don't apply well. The ends are all wrinkly and it took me a while to file the ends off. They're supposed to be sugar skulls but the designs are so big and poorly placed that you can't tell what they are once they're on your nails. Overall, I'm really disappointed in these. I'll stick to my Sally strips from now on.
Have you guys tried any? What are your thoughts?

Tuesday, June 26, 2012

Take a walk on the wild side: leopard/gradient/striping

So, I haven't posted in forever. I've not been doing any intense nail art. I got quite obsessed with cremes so I had mostly normal brightly colored manicures the past few months. I saw a tutorial on leopard nails  at Chalkboardnails.com though, and I had to try them. I have also seen several different ways to do gradient nails and decided to give that a go as well. Here's the results. 

I'm absolutely obsessed with the way the leopard turned out. I don't love the gradients so much. but they're tolerable. I added a glitter over my pinky to hide some of the mistakes. I think I should have chosen colors that were more similar. Or perhaps not a metallic. I used striping tape on my ring finger because there's no way in hell I could have free handed perfect stripes. haha
Polishes used:
White - Sinful Colors: Snow Me White
Black - China Glaze: Liquid Leather
Gold- Nicole: Not a Gold Bigger
Glitter - Color Club: Take the Stage

Tools used:
Dotters for the leopard
make up sponge, aluminum foil, toothpick for the gradients
striping tape for the stripes 

Monday, June 25, 2012

As we venture through time and space -- GALAXY Nails!


I typed this blog up in January. Why didn’t I post it? I kept thinking I would do galaxy nails again. Perfect it. But then I fell in love with other nail fashions and everyone was doing the galaxy nails… but here goes. It’s not winter, it’s now summer… enjoy!


As a child, I always loved learning about the cosmos… I even had a place mat that had all the planets (including Pluto) in order. When I saw galaxy nails all over tumblr and pinterest, I had to try it!

While looking through the instructions, I thought it would be hard. A make-up sponge? Tweezers? More than 5 different colors? It’s simpler than I thought.

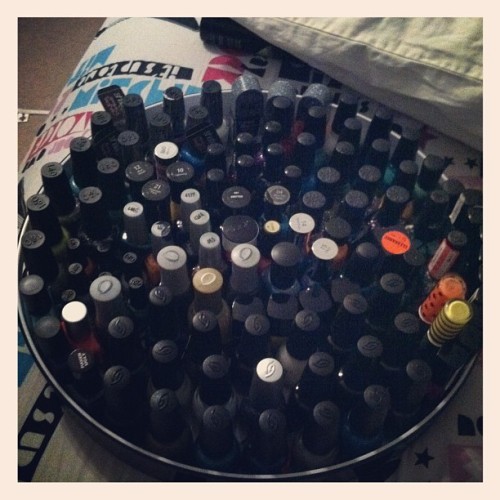
I flew to LA with these bad boys and they held up to Hollywoods’ glitz & glamour. Eat your heart out, Orlando Bloom!


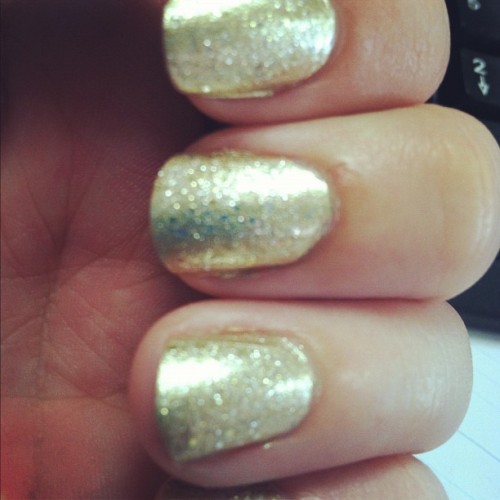
The first nail was a little tricky, but once I got the hand of it… it was super fun!

Here’s a list of what you’ll need, what I used, and other random suggestions:

1)     Make-up Sponge
2)     Tweezers
3)     Blue or purple dark base – China Glaze VIII (dark eggplant purple)
4)     Medium blue/purple – Sally Hansen Thinking of Blue (navy)
5)     Lighter color – Mattese Elite Dead Punk Rocker ( metallic gray/blue)
a.      Any kind of gray/blue/purple would work!
6)     Bright color – Sally Hansen Tough Luck (lime green shimmer)
a.      This shimmer looked amazing! It brought it all together
7)     Glittery top coat – China Glaze Fairy Dust

The amount and types of colors could be interchanged so much! I think that’s why I love galaxy nails so much, it will always be different.

Instructions after you have put on your base color and it’s dried:

1)     Rip an incredibly small piece off of your make up-sponge
2)     Dip it into your medium; make sure to sponge it around on your paper (or aluminum) to get the excess off of it.
3)     Dab it in a circular motion on center of your nail.
4)     Wait until it’s dry.
5)     Dip another side of the sponge into your lighter color
6)     Dab it across your nail any way you would like. I did it diagonally.
7)     Dry.
8)     Sponge your bright color and go over your ligher color!
9)     Some people use a white or light gray to dot tiny, tiny stars, but I didn’t do that.
10) DRY!
11)  Use your glittery top coat!
12) You’re done!

Drinking on the plane to LA !
I love it. My friend’s sister refers to this as if it’s one easy coat. But it certainly is easy to try and one of the easiest nail arts. If it smudges, it looks like it’s SUPPOSE to be like that.

Get creative with this! I'm thinking of doing a daytime galaxy color scheme. The sponge tool is a must try for anyone getting into nail art.

Try it out! And let us know what you did differently. 

Friday, April 13, 2012

Neon Trees Nails

So, Neon Trees is one of my favorite bands and I'm going to see them tonight. I did a mani in honor of them haha. This is their album cover for their new single Everybody Talks.
I tried to do the head sunglasses on my thumb. It came out a bit shaky but from far away it looks great. haha. I love them though. They're pretty fun and I got to use three of my favorite glitters. =)
I used two coats of everything. I had to play with the black glitter a little to get it to go every where.
Black: China Glaze - Liquid Leather
Red Glitter: Wet N Wild - Behind Closed Doors
Black Glitter: Wet N Wild - Tangled In My Web
Multi Colored Glitter: Spoiled - Shuffle The Deck
White: OPI - Skull & Glossbones

Saturday, March 10, 2012

Influenster: voxbox

I decided to make one big post for the rest of my VoxBox from Influenster.com
First up is the chocolate. It was delicious!! Super creamy and the right about of sweet. It didn't last long in my house, needless to say. 

My favorite product that I received was definitely this Gillette Venus & Olay razor. Seriously my legs have never felt smoother or more moisturized. I recommend this product to any girl who hates shaving her legs (which is every girl, right?). It makes your legs feel like a supermodel's haha. 
The Truvia sweetener was perfect cause I'm on a diet so I can't really eat a ton of sugar. So I can sweeten my tea guilt free! No calories and it's all natural. It doesnt leave an after taste either!

Last but not least is the Tea samples. I've only tried 3 of the flavors but they were all great. I'm always iffy about buying a whole box of tea if I don't know that I like if, so this was a great way to try all different flavors. And they're caffeine & calorie (from what I've researched anyway) free! 

Tuesday, March 6, 2012

KISS: Nail Dress up for review

"Kiss Nail Dress

Fashion That Sticks
Introducing Kiss Nail Dress, ultimate nail fashion for tips and toes! Just peel, apply, and shape for a manicure that lasts up to 10 days. On in minutes, off in seconds without remover. Nail Dress is available in 18 different styles, many of them featuring 3-dimensional jeweled designs. Check out Peplum, a deep black with multi-colored gems for a pop of color, or Babydoll, for a golden and glamorous jeweled look. Skip the topcoat, Nail Dress has it built in.

With 28 strips in each package, you can cut up your extras to create designs that can be used on top of polished or artificial nails. Nail Dress doesn’t dry out the way other polish strips can, so you can save them to use on your next DIY mani. A nail design booklet is included in each package, just in case you need a little inspiration.

And don’t forget about your feet! Nail Dress looks awesome on toes, too – just use the square side of the sticker for a perfect fit.

Where to Buy
Nail Dress’ suggested retail is $6.99 and is available in all major drug chains and mass retailers like WalMart, CVS and Walgreens.

Visit KissNailDress.com to learn more!"


I recieved these in my VoxBox from Influenster.com. (complementary product for testing and review purposes) They have a cute black and silver pattern on them. I was eager to try them out. They come with 28 strips, so more than enough for two manis. I loved the way the strips were packaged. Since the backing plastic was clear, you can hold the sticker over your nail to determine which is the perfect size. They have the rounded and squared ends for your fingers or toes. Just below this photo is KISS' information on the product. 


Below is one of the stickers on my thumb nail. As you can see they're plenty wide and long enough for most nails. (I have really wide fingers haha). I've seen a few other people's reviews on these and they dont look like they filed the stickers off well. The file that comes with them has a black super rough side and a pink kind of rough side. Use the pink side last to get a smother finish on the ends. 
The finished product! I love them. So cute. I'll update later and let you know how long they actually last. The package says up to 10 days but I know the Sally ones don't last but a few days for me.

Edit: So I only ended up wearing these for like 3 days because they started chipping a little and I can't stand that. But they peeled off super easy and didnt seem to damage my nails as much as the Sally ones do. 

Monday, March 5, 2012

Influenster: love voxbox

I was too excited to wait about blogging. So here I am, blogging from my actual job. haha.
This was my first voxbox so it was super fun to open and see what prizes were hidden inside!


I received a sample package of Truvia, which I've been wanting to try. I've been dieting so I need a sweetener with no calories. And speaking of my diet, they sent me this Ghiradelli Chocolate... I hate you influenster, haha. Its all natural though. I guess that's a plus.

Below is are some polish strips by Kiss. They have kind of a leopard/giraffe looking print on them. I'm ready to try these guys out. They're a cheaper alternative to Sally's. The Kiss brand are only 6.99!
Also in my box of treats was an Herbal Tea Sampler. Which is literally perfect for me. I've been wanting to try a bunch of different teas to see which ones I really like and this sampler has two of each of the nine flavors. They range from acai berry to mint and everything in between.
Finally, the voxbox of love brought me a Venus & Olay Gillette razor so my legs can hopefully feel silky smooth. haha

I really can't wait to try these products out and let you know what I think about them.
Look for a ton of posts this week. I'll try not to post all the reviews in one day.

Just got my influenster voxbox!

Reviews of everything coming soon! I'm really excited to try the polish strips and the tea!

Saturday, March 3, 2012

Connect The Dots: Ninja Polish!

I've fallen for a polish called Connect the Dots by Lynderella which is pretty difficult to get your hands on. Luckily Wendy just introduced me to a site where you can get a dupe at a very reasonable price and pretty easily. The site is Ninja Polish! They have a lot of hard to find polishes and they're cheaper than most places. Check them out. I can't wait to get my first order.
Below is my current connect the dots mani.
Base coat: 2 layers of Julep's Charlotte
Toped with Connect The Dots

Tuesday, February 28, 2012

Color Club Dry Ice!

Wendy and I took another successful trip to TransDesign. A.K.A. Polish Heaven. She purchased these quick dry drops from Color Club on a previous trip and recommended them to me.  I'm notorious for messing up my nails before they dry. I don't think I've ever painted my nails without smearing them or something. haha. With these magical drops, I didn't have to wait an hour for them to dry! Seriously, get some cause they are worth the money. They come with a little eye dropper and you just put a drop on your nails and they're dry! Perfect! haha
Below is the mani I tried them on. I just really love polka dots and wanted to try out my new polishes. Most of them are from the Poptastic Color Club collection. And I love them. They're beautiful creme colors. Plus, their names don't make me like them any less. haha
 Color Club: 
Base Coat: Twiggie
Pink: Warhol
Purple: Pucci-Licious
Green: Edie

China Glaze:
Blue: First Mate

Monday, February 20, 2012

Steven Tyler inspired nails:

So, I'm an avid fan of American Idol... as least until the top 24 when they eliminate all my favorites.
I keep noticing Steven Tyler's nails and I love them. So, I decided to give it a go. Here's his version, followed by my own attempt.


I think they would have turned out better if I had a nude polish for a base coat.
I did what I could with what I had though.
Base: OPI's Skull & Glossbones (from the Pirates line)
Silver: Revlon Chrome
Black: an Art Deco nail art brush I found at the dollar tree. haha

Wednesday, February 15, 2012

A few more past manis:

And my polish collection. haha I finally got something to put them in where I can find what I want.

Sorry all these are messy. I'm not a fan of cleaning up haha. I let time do that for me. I found this Cosmetic Arts lacquer at Ross for $1.50. I'm a sucker for purple polish so I grabbed it and a teal color. It takes forever for them to dry but they're gorgeous colors. The dry time could also be attributed to the top coat I used. I had a Sally top/base coat that I had gotten for free when I purchased some other polish. So, I added the glitter that I got with my first Julep package in and shook it up a bit. I love the way it looks. It's like little silver flakies. 

Wendy and I took a trip to our favorite place, Trans Design! I picked up two of the China Glaze Magnetix polishes. The middle finger is Pull Me Close and the rest are Attraction. The cool thing about these is that the CG magnet (sold separately) has three different designs on it. The mani is kind of messed up because I'm incapable of holding anything still even if its for a few seconds but they apply well and are very simple to magnetize. 

This mani is one of the Justin Bieber by Nichole polishes I decided to purchase. (Shut up, I love Biebz.) I used two coats of Not a Gold Bigger and topped it with a coat of Serena William's by OPI Spark De Triomphe. Love the combo. 


Julep Mavens:

So you've seen my posts about Julep polishes. Why not try them out for yourself?
They have an offer right now where your first month is only $1! You usually get 2-3 polishes so what have you got to lose?
go to Julep.com and take the style quiz and see which box is right for you.
Then when you check out, enter the promo code: shareonfeb

Wednesday, February 8, 2012

Been a while since i have updated...

Here's a few manis I've done lately. Mostly the OPI Nicki Minaj line (because I love them!) and some craptastic polish strips at the bottom.
OPI's "Did It On 'Em" - green
OPI's "Metallic 4 Life" - accent nail
OPI's "Fly"
OPI's "Save Me"

Julep's Kim with OPI's SuperBass Shatter

Julep's Hayden with Lynderella's Connect The Dots on top.
Hayden applied like crap. I had to use a ton of polish for it to cover. Connect the Dots is my new favorite polish however.

These were an awesome pattern but they strips were way too thick. I could not get them to flatten around my nails. The packaging suggested a hairdryer, which I attempted. Didn't work. They also peeled right off. I got these on of the deal sites and it was not worth the effort I spent purchasing them, even though they were free. So bascially, don't purchase any strips from FabulousNails.com.