Showing posts with label nails. Show all posts

Tuesday, June 26, 2012

Take a walk on the wild side: leopard/gradient/striping

So, I haven't posted in forever. I've not been doing any intense nail art. I got quite obsessed with cremes so I had mostly normal brightly colored manicures the past few months. I saw a tutorial on leopard nails  at Chalkboardnails.com though, and I had to try them. I have also seen several different ways to do gradient nails and decided to give that a go as well. Here's the results. 

I'm absolutely obsessed with the way the leopard turned out. I don't love the gradients so much. but they're tolerable. I added a glitter over my pinky to hide some of the mistakes. I think I should have chosen colors that were more similar. Or perhaps not a metallic. I used striping tape on my ring finger because there's no way in hell I could have free handed perfect stripes. haha
Polishes used:
White - Sinful Colors: Snow Me White
Black - China Glaze: Liquid Leather
Gold- Nicole: Not a Gold Bigger
Glitter - Color Club: Take the Stage

Tools used:
Dotters for the leopard
make up sponge, aluminum foil, toothpick for the gradients
striping tape for the stripes 

Monday, June 25, 2012

As we venture through time and space -- GALAXY Nails!


I typed this blog up in January. Why didn’t I post it? I kept thinking I would do galaxy nails again. Perfect it. But then I fell in love with other nail fashions and everyone was doing the galaxy nails… but here goes. It’s not winter, it’s now summer… enjoy!


As a child, I always loved learning about the cosmos… I even had a place mat that had all the planets (including Pluto) in order. When I saw galaxy nails all over tumblr and pinterest, I had to try it!

While looking through the instructions, I thought it would be hard. A make-up sponge? Tweezers? More than 5 different colors? It’s simpler than I thought.

I flew to LA with these bad boys and they held up to Hollywoods’ glitz & glamour. Eat your heart out, Orlando Bloom!


The first nail was a little tricky, but once I got the hand of it… it was super fun!

Here’s a list of what you’ll need, what I used, and other random suggestions:

1)     Make-up Sponge
2)     Tweezers
3)     Blue or purple dark base – China Glaze VIII (dark eggplant purple)
4)     Medium blue/purple – Sally Hansen Thinking of Blue (navy)
5)     Lighter color – Mattese Elite Dead Punk Rocker ( metallic gray/blue)
a.      Any kind of gray/blue/purple would work!
6)     Bright color – Sally Hansen Tough Luck (lime green shimmer)
a.      This shimmer looked amazing! It brought it all together
7)     Glittery top coat – China Glaze Fairy Dust

The amount and types of colors could be interchanged so much! I think that’s why I love galaxy nails so much, it will always be different.

Instructions after you have put on your base color and it’s dried:

1)     Rip an incredibly small piece off of your make up-sponge
2)     Dip it into your medium; make sure to sponge it around on your paper (or aluminum) to get the excess off of it.
3)     Dab it in a circular motion on center of your nail.
4)     Wait until it’s dry.
5)     Dip another side of the sponge into your lighter color
6)     Dab it across your nail any way you would like. I did it diagonally.
7)     Dry.
8)     Sponge your bright color and go over your ligher color!
9)     Some people use a white or light gray to dot tiny, tiny stars, but I didn’t do that.
10) DRY!
11)  Use your glittery top coat!
12) You’re done!

Drinking on the plane to LA !
I love it. My friend’s sister refers to this as if it’s one easy coat. But it certainly is easy to try and one of the easiest nail arts. If it smudges, it looks like it’s SUPPOSE to be like that.

Get creative with this! I'm thinking of doing a daytime galaxy color scheme. The sponge tool is a must try for anyone getting into nail art.

Try it out! And let us know what you did differently. 

Friday, April 13, 2012

Neon Trees Nails

So, Neon Trees is one of my favorite bands and I'm going to see them tonight. I did a mani in honor of them haha. This is their album cover for their new single Everybody Talks.
I tried to do the head sunglasses on my thumb. It came out a bit shaky but from far away it looks great. haha. I love them though. They're pretty fun and I got to use three of my favorite glitters. =)
I used two coats of everything. I had to play with the black glitter a little to get it to go every where.
Black: China Glaze - Liquid Leather
Red Glitter: Wet N Wild - Behind Closed Doors
Black Glitter: Wet N Wild - Tangled In My Web
Multi Colored Glitter: Spoiled - Shuffle The Deck
White: OPI - Skull & Glossbones

Tuesday, February 28, 2012

Color Club Dry Ice!

Wendy and I took another successful trip to TransDesign. A.K.A. Polish Heaven. She purchased these quick dry drops from Color Club on a previous trip and recommended them to me.  I'm notorious for messing up my nails before they dry. I don't think I've ever painted my nails without smearing them or something. haha. With these magical drops, I didn't have to wait an hour for them to dry! Seriously, get some cause they are worth the money. They come with a little eye dropper and you just put a drop on your nails and they're dry! Perfect! haha
Below is the mani I tried them on. I just really love polka dots and wanted to try out my new polishes. Most of them are from the Poptastic Color Club collection. And I love them. They're beautiful creme colors. Plus, their names don't make me like them any less. haha
 Color Club: 
Base Coat: Twiggie
Pink: Warhol
Purple: Pucci-Licious
Green: Edie

China Glaze:
Blue: First Mate

Monday, February 20, 2012

Steven Tyler inspired nails:

So, I'm an avid fan of American Idol... as least until the top 24 when they eliminate all my favorites.
I keep noticing Steven Tyler's nails and I love them. So, I decided to give it a go. Here's his version, followed by my own attempt.


I think they would have turned out better if I had a nude polish for a base coat.
I did what I could with what I had though.
Base: OPI's Skull & Glossbones (from the Pirates line)
Silver: Revlon Chrome
Black: an Art Deco nail art brush I found at the dollar tree. haha

Wednesday, February 15, 2012

A few more past manis:

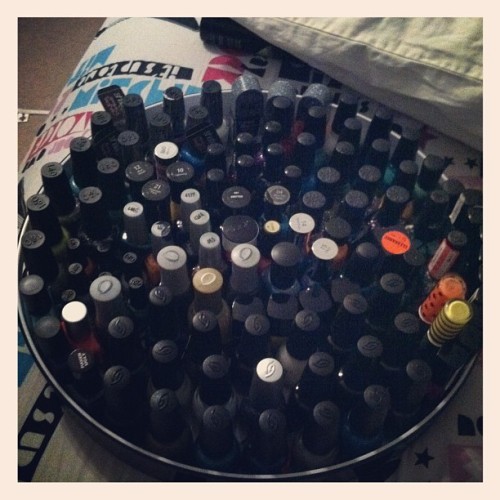
And my polish collection. haha I finally got something to put them in where I can find what I want.

Sorry all these are messy. I'm not a fan of cleaning up haha. I let time do that for me. I found this Cosmetic Arts lacquer at Ross for $1.50. I'm a sucker for purple polish so I grabbed it and a teal color. It takes forever for them to dry but they're gorgeous colors. The dry time could also be attributed to the top coat I used. I had a Sally top/base coat that I had gotten for free when I purchased some other polish. So, I added the glitter that I got with my first Julep package in and shook it up a bit. I love the way it looks. It's like little silver flakies. 

Wendy and I took a trip to our favorite place, Trans Design! I picked up two of the China Glaze Magnetix polishes. The middle finger is Pull Me Close and the rest are Attraction. The cool thing about these is that the CG magnet (sold separately) has three different designs on it. The mani is kind of messed up because I'm incapable of holding anything still even if its for a few seconds but they apply well and are very simple to magnetize. 

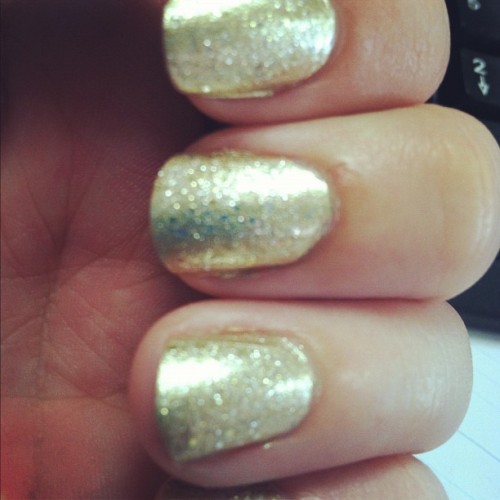
This mani is one of the Justin Bieber by Nichole polishes I decided to purchase. (Shut up, I love Biebz.) I used two coats of Not a Gold Bigger and topped it with a coat of Serena William's by OPI Spark De Triomphe. Love the combo. 


Thursday, January 5, 2012

Julep Trina


Waiting for a package to be delivered seems like it takes forever, that package being nail polish seems to take an eternity. Perhaps, I’m dramatic but I could not get Julep’s Maven It-Girl package in my hands fast enough.

The only color I have tested is Trina. The color is a eggplant purple that has hints of dark red shimmer in it. The shimmer was hard to capture in a photo, but I’ll try to get a better one up of it once I go out for the day.


Julep’s Trina reminds me of their version of OPI’s Lincoln Park After Dark but with a barely noticeable hint of shimmer. If you’re a fan of OPI’s LPAD, Trina would be a great addition to your collection.

The bottle suggests two coats of Trina, but two coats make it completely opaque and a little darker. One coat would do fine with a nice top coat.

For the top coat, I used Julep’s Fast Drying Topcoat. I think I put it on wrong, but it took a little over ten minutes to dry. (Though, Ashley said hers took 2 minutes). Julep responded quickly on twitter: making sure I shook the nail polish before applying and suggesting running nails under cold water for twenty minutes. Instead, I waited a while and after an hour, they were completely dry. (I will try the cold water trick and the ice cubes in a bowl one day!)

I’m sad that my Holiday glitters have been retired for now, but Julep’s Trina has made me fall back in love with dark nail polish.

Sunday, December 25, 2011

Really messy nails. Too tired to clean up. haha

Merry Christmas guys!
I hope you all got lots of fun things from Santa. I got lots of polish!
I tried some new stuff with it tonight. Here's the result.
Yeah, I know they're really messy. haha. It's the first time I've tried doing tips. I tried using paper reenforcers (suggested by Wendy) and a rubber band (I saw this somewhere on the internet). Neither really worked for me so I just freehanded a stripe across them. I used gold striping tape that Wendy gave me for Christmas to divide the two colors. I think they look pretty cool. Let me know what you think.
Colors Used:
  • China Glaze- Liquid Leather
  • China Glaze - For Audrey
  • Julep- Fast Drying Top Coat